With modern virtual production techniques, studios no longer need to rely solely on physical sets. Instead, they can have a team of virtual production designers blend live-action and computer-generated content during filming. Unreal Multi-User Editing (MUE) helps to streamline the process. Here, we explain what Unreal Multi-User Editing is, its benefits, and how to install and set it up.
Follow along or jump ahead to the section that interests you the most.
➡️ essential Virtual Production Software — Free
Back to topWhat Is Unreal Multi-User Editing?
Back to topUnreal Multi-User Editing is a developer tool that enables multiple users to collaborate on the same asset in real-time. Unreal Multi-User Editing allows any user on the same network to connect to this shared server.
What Is Unreal Multi-User Editing Used For?
Unreal Multi-User Editing was originally developed for large-scale virtual film and television production teams where the virtual world for a live shoot needs to be designed, built, and lit.
However, Unreal MUE has been adopted by other industries — such as game development — where multiple developers need to work on the same art and game asset.
📘 Related Resource: Virtual Production Field Guide
Back to topUnreal Multi-User Editing Benefits
There are several benefits of using Unreal Multi-User Editing, including:
- Reduce iteration times.
- Receive instant feedback on changes.
- Increase collaboration.
How to Setup and Install Unreal Multi-User Editing
Here is how to setup and install Unreal Multi-User Editing.
1. Enable the Plugin
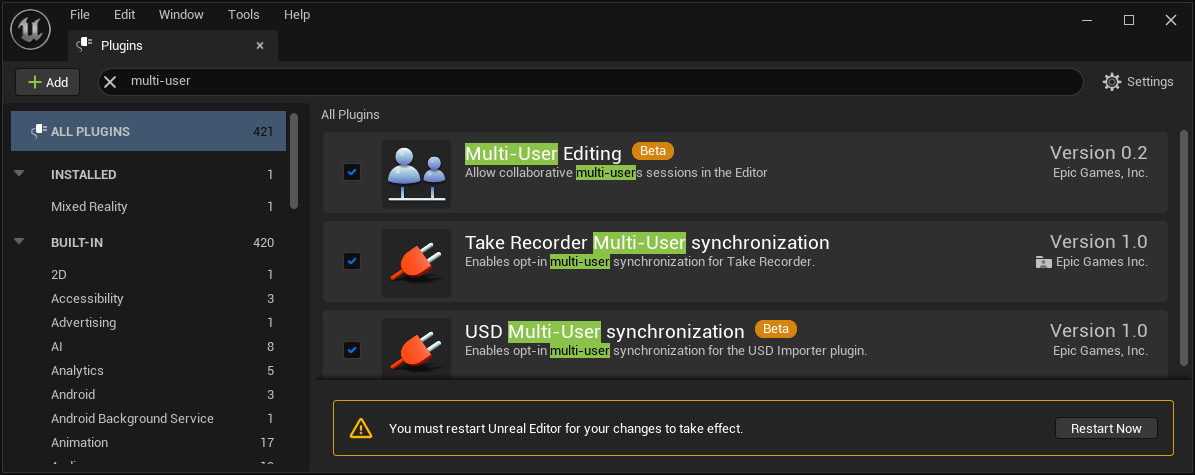
Find the “Plugins” button in the Settings menu and then search for “Multi-User”. [Note: Enabling the Multi-User plugin will require you to restart the Unreal Editor.]
Optional Step — Setup Toolbar
If you would like to have access to a toolbar, you can also modify your Project Settings to enable Multi-User-Editing Toolbar button. [Note: This will also require you to restart the Unreal Editor.]

Optional Step — Setup Avatar
Once you have enabled the Multi-User plugin, set up your avatar display name and color. While this is an optional step, it makes it easier for other users to quickly identify your avatar in the interface.
2. Set Up the UDP Messaging Address
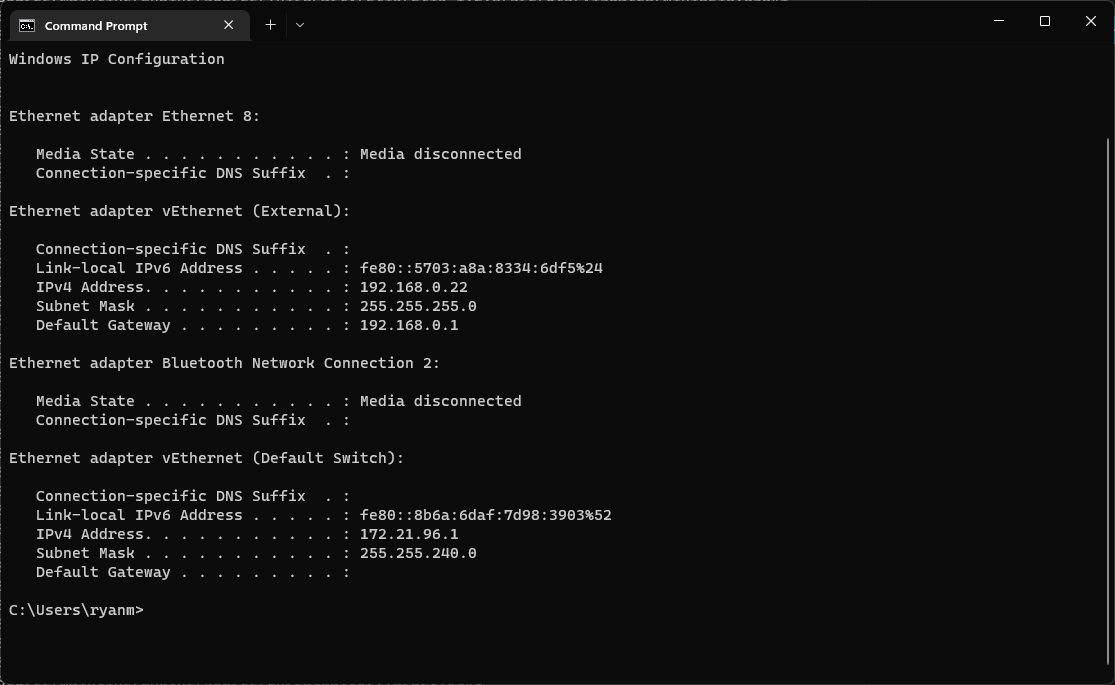
Find the UDP messaging address in Developer Tools Settings. For the Unicast Endpoint, add the local IP address of your current workstation.
[ Note: If you do not know your IP address, you can find it by using ipconfig in a cmd window.]
If you are hosting the Multi-User server, open the Advanced tab in the UDP Messaging section and enter the IP addresses of the other users in the “Static Endpoints Table”, followed by a colon and the port number 6666 that Multi-User sessions uses to communicate.
It should be noted that these are Internal IP addresses and all of your machines need to be on the same LAN network. Otherwise, you will need to setup a custom private VPN server so the computers can discover each other as if they were on a LAN.

Back to top
How to Use Unreal Multi-User Editing
Once setup is complete, you will be able to access the Multi-User browser by either clicking the button in the upper bar or accessing it from the Tools menu.

As soon as you open the Multi-User browser, it will try to find any existing open sessions hosted on other servers. If anyone else is hosting the session you are intending to join, you can quickly join and begin collaborating.
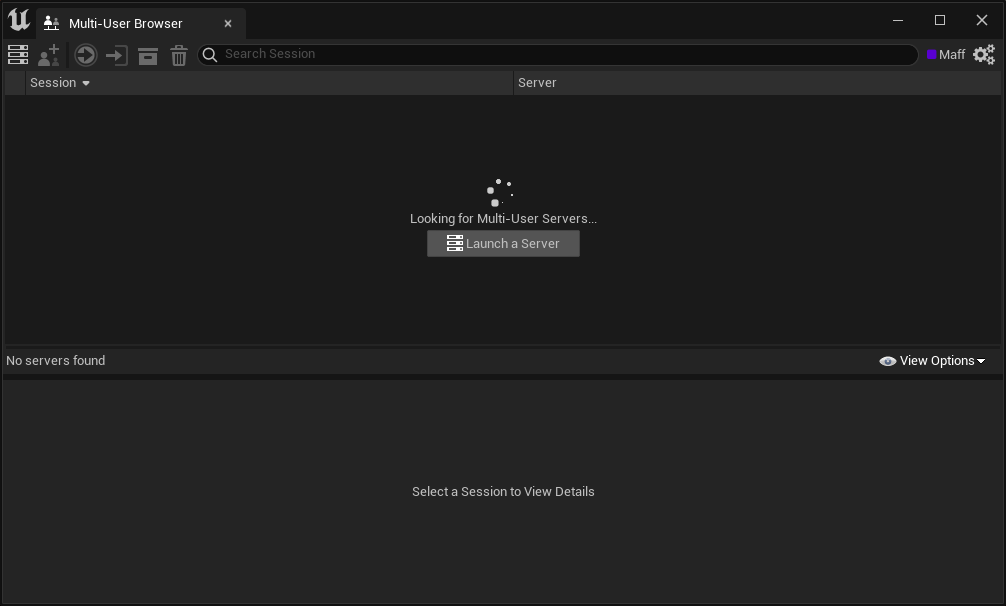
If there are no sessions available, Unreal Editor will offer you a button to launch our own server, which will open in a separate terminal window.
When you launch your own server, you will be prompted to create a new session or rejoin any older sessions that you may still have available on your system.
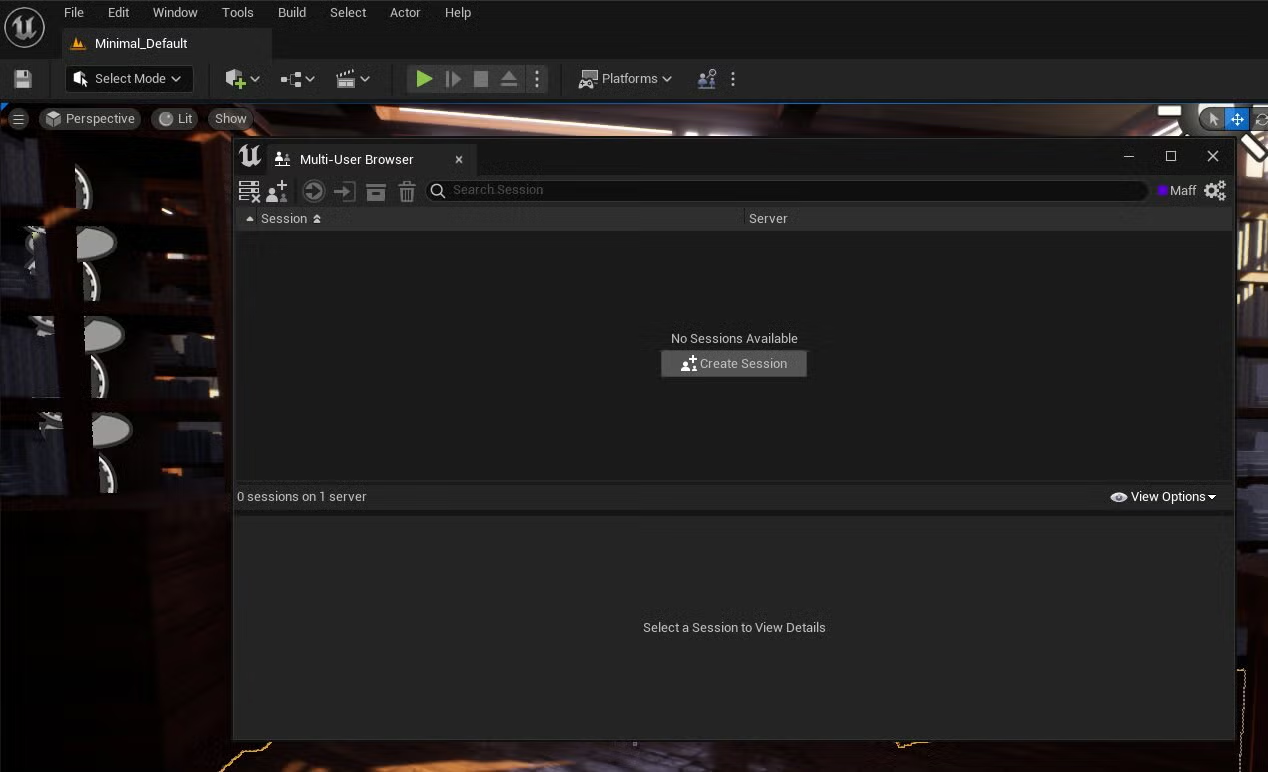
However, it is recommended that you do not use older sessions as each session should represent an individual multi-user edit time frame. Rather, you should begin a fresh session for each new collaboration in Unreal Multi-Engine Editing.
The prescribed best practice is to shut down your session when you have finished collaborating and submit your changes back to your Helix Core server.
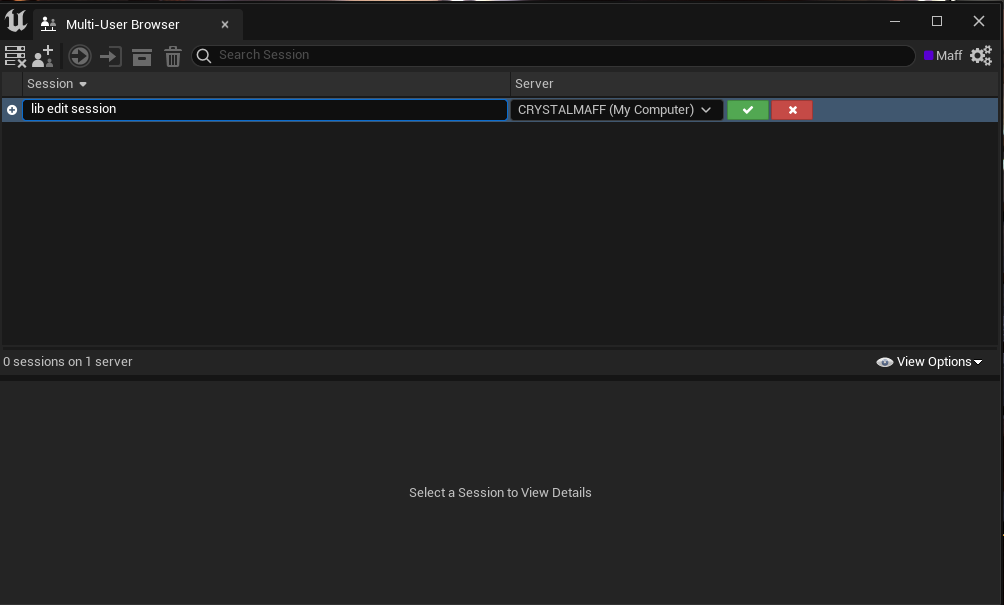
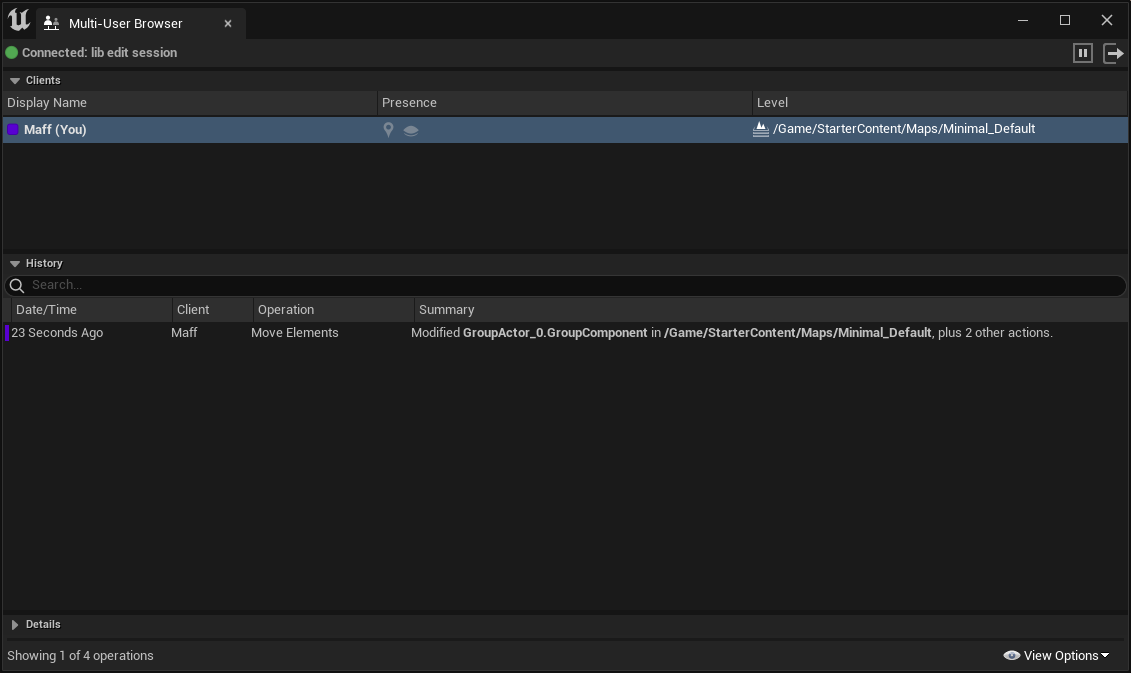
When you create a new session, others can join and begin making edits. Each edit will be recorded and will show:
- When the edit occurred.
- Which user made the edit.
- What the edit was.
In addition, a brief automatic summary of the event will also be shared.
As users join your session, you will have access to a couple of buttons in the “Presence” column.
- Button Icon 1 (Position) — Jump directly to the position of the user so that your camera views are aligned.
- Button Icon 2 (Hide) — Hide the user icons in your viewport in case you find the user avatars too distracting.

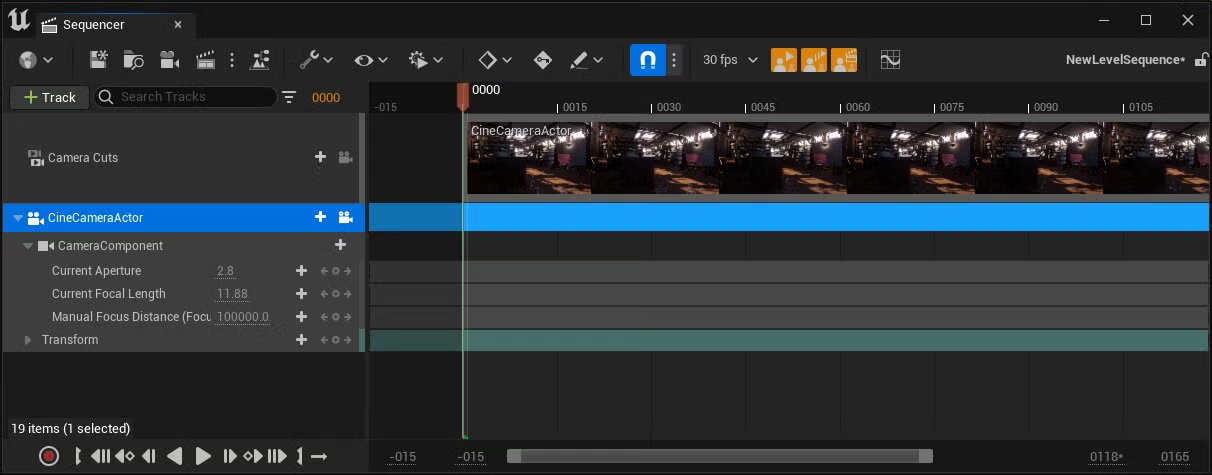
Multi-User-Editing also adds three new buttons — which are shown here in orange — to the Sequencer window toolbar. From left to right, the new buttons are:
- Button Icon 1 (Multi-User Playback Sync) — Sync timeline scrubbing between users.
- Button Icon 2 (Multi-User Unrelated Timeline Sync) — Playback and scrubbing of the Sequencer window will be synchronized when receiving any other user time sync from any sequence.
- Button Icon 3 (Multi-User Remote Open) — Opens the Sequencer window to the same sequence for all users.
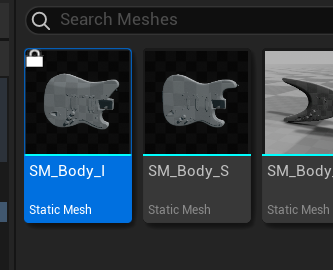
While working on certain assets, you can lock the asset to prevent other users from editing the same asset at the same time. A locked asset will have a lock icon to indicate that the asset is currently being edited. Once an edit is saved, the asset will unlock.
Users should be able to view most of the edits that are made in real-time. However, certain assets — such as changes to individual material assets — may require a save before they are visible to other users.
When an edit is saved, the other users may be prompted to save their own current work. Doing so will cause the level assets to reload from the file with the latest changes.
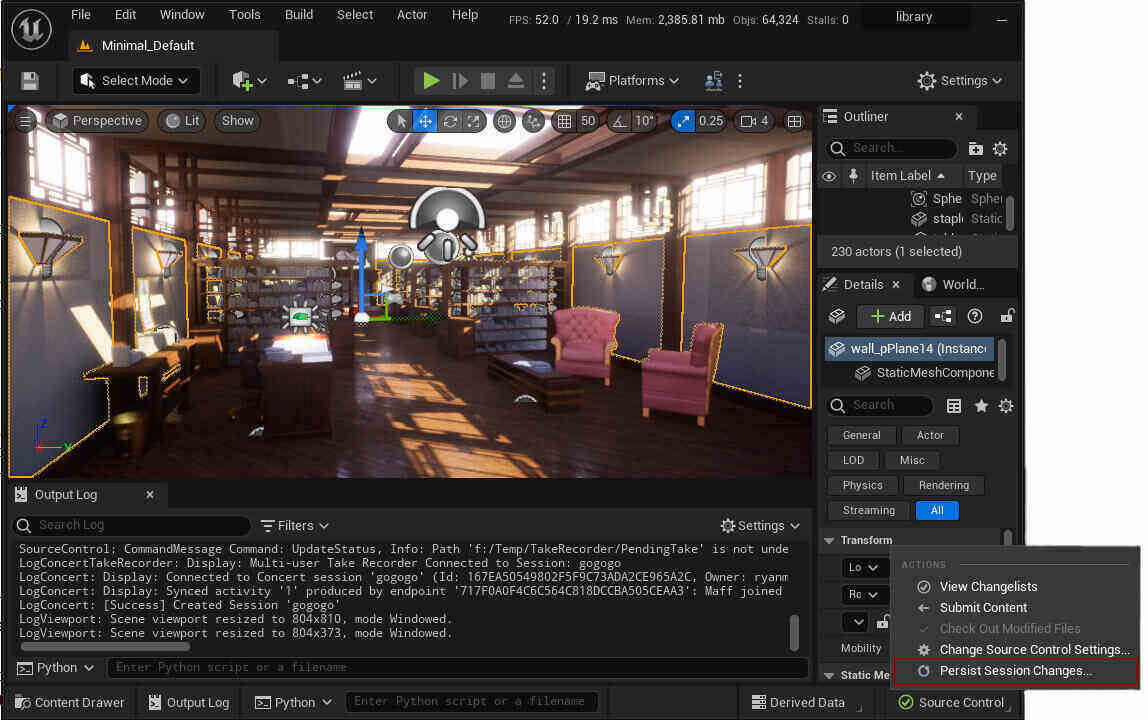
At the end of your session, you will need to save your revisions to your version control depot. To do so, go to the Source Control menu and select “Persist Session Changes”. This will submit the changes back to your version control system.
Back to top
Get Started: Unreal Multi-User Editing
Get started on Unreal Multi-User Editing today with Helix Core, considered to be the industry standard for version control in Media & Entertainment and is trusted by top virtual production teams across the globe.
Helix Core is free to use for up to five users.
