Bootstrapping Helix TeamHub
Helix TeamHub Admin is a simple UI application for configuring and managing the TeamHubconfiguration. Use the following steps to configure hostname and mail settings to your instance. To start, go to the /admin URL of the TeamHub installation.
Step 1: Configure hostname
To use TeamHub, a valid hostname is required. The hostname must be a fully qualified domain name (FQDN) and resolvable by product users. TeamHub uses this hostname in repository URLs, email links, and API requests. Even though TeamHub can be configured to use an IP address or another hostname assigned to the server, a delegated alias (CNAME) or name (A) is recommended to simplify future server relocation.
The Preferences page provides a number of other configurations, such as Authentication method, enabling the LDAP interface, and enforcing SSL. However, the first step is to bootstrap TeamHub to make sure everything works as expected. Enter the hostname and click Save preferences.

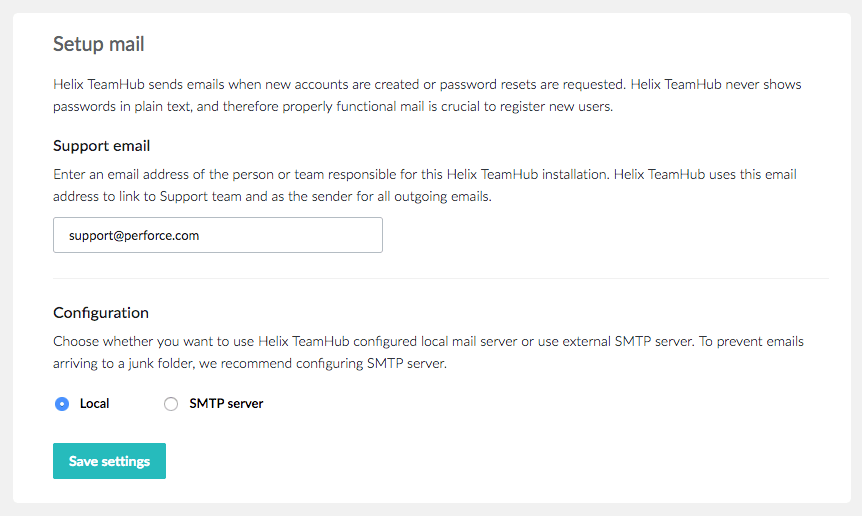
Step 2: Set up mail
Enter the Support email address, this is used in all outgoing TeamHub emails, as well as links to the Support team throughout application. To configure an external SMTP server for handling emails, see Mailing Configuration.

Step 3: Apply configuration changes
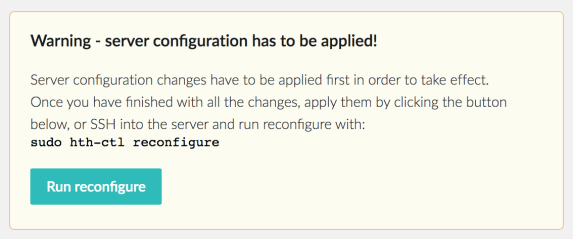
When you complete any of the steps above, the following warning is displayed:

This warning is displayed every time the configuration is changed in a way that affects the underlying TeamHub services. Click Run reconfigure to address this issue.
For Cluster Deployment, apply the changes on every TeamHub Web server.
Congratulations, your TeamHub instance is successfully bootstrapped and ready to use. It's a good time to test everything and further extend TeamHub for production use:


